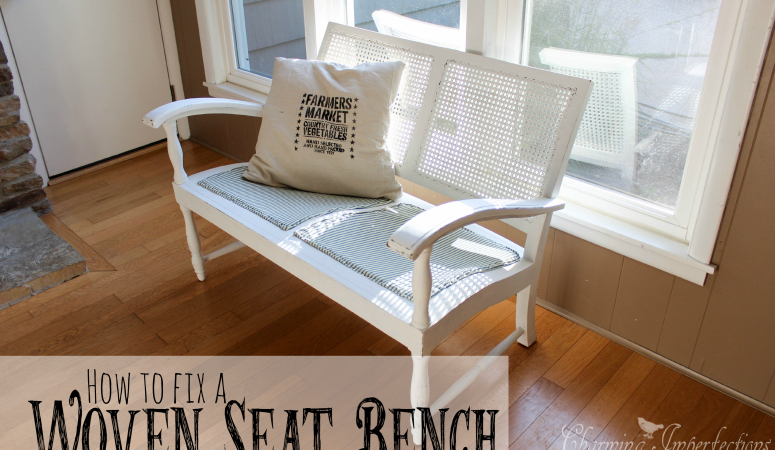
Have you ever gotten really stuck on a project? Like, you had all this energy and gumption to get it started, but then something stopped your momentum and there it sat, untouched for months? This lovely little bench had me really stumped for quite some time which was really a shame.
Remember that dresser I turned into a desk? Well, it was at that same garage sale that I snagged this Pier 1 bench up for $7! It had two major flaws: a big hole in the cane woven seat and the fact that is wasn’t vintage. But, since it was seven dollars I felt I could do something with it. The challenge of the seat, however, really got me stuck. I wasn’t about to learn how to do cane weaving (even though it seems like a cool skill to have), so, how to repair that hole (on the left of the center)?
Inspiration finally struck months after we bought the thing! It may see odd, but it came in the form of carpet remnants!
Do you have any cane woven pieces of furniture that have seen better days? Well, keep reading to learn what to do with a broken woven bench.
Since I was so stuck on this bench, I decided to go ahead and paint it before fixing the seat. I don’t usually work in this order, but something had to move forward! I simply used some leftover white paint in eggshell finish. Using a roller made it go fast. Having an 18 month old “help” made it difficult.
The hole was large enough that I was going to have to replace the seat, but needed a strong enough material to span the space. I cut the old seat out and used that piece as a template to cut the carpet. Make sure you allow about an inch extra around the perimeter.
If your carpet is ugly like mine, you’ll want to cover it in some different material. Cut that out as well, again, making sure to leave some extra.
Gluing the material to the carpet will make things a lot easier, something I didn’t realize until I made the second half of the seat. A hot glue gun will work well for this: just flip the carpet upside down over the back side of the material, fold the material over, and glue!
Now it’s time to attach it to the rest of the bench. Get out your air compressor and Brad Nailer. I used some big 2 inch staples to make sure it’s really secure. What I found worked well is to staple once on every side and then the corners. Then keep stapling around the seat, pulling the carpet tight all the while.
Lastly, I took a sander to it to distress the edges. Love that distressed look!
You wouldn’t believe it’s the same bench I found a looooong time ago at that garage sale.
Despite getting stumped on it for so long, I enjoyed doing this little project because it forced me to think creatively and outside of the box. I was able to use carpet remnants from our home and fabric to create seats that replaced the woven ones perfectly!
If you get stumped on a project, don’t get rid of it too quickly! A solution might just show up in the most unexpected way. Be sure to subscribe to the newsletter for more inspiration and solutions!
Follow the fun on Periscope! @charmimperfect


 search")

 Have fun creating beautiful things!")

Leave a Reply